
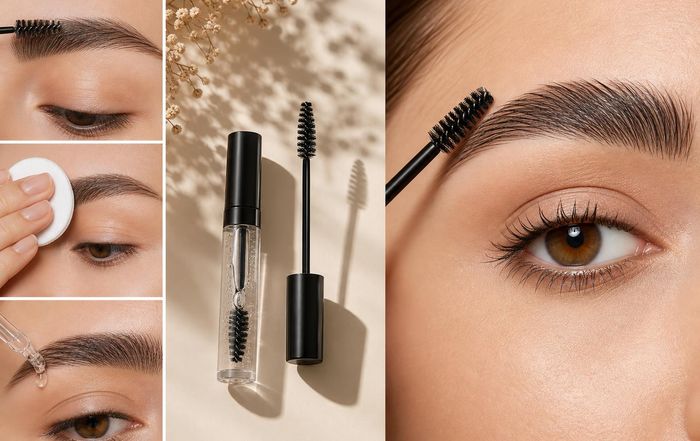
How to Make Eyebrow Gel Hold All Day Without Flaking
When brow gel behaves, it can lift the whole face: brows look fuller, cleaner, and more polished with almost no effort. When it misbehaves, you get stiffness, white flakes, or patchy hold that ruins otherwise flawless makeup. Flaking is one of the most common complaints about brow gel, whether it's a budget clear formula or a high-end tinted version.
This guide looks at why brow gel flakes in the first place and how to prep, apply, and layer products so your brows stay groomed all day without that dry, crusty finish. It also covers how different formulas behave, ingredient tips for sensitive skin, and what to do if you still get flakes. Those who want to go deeper into brow shaping and everyday looks may also find our top makeup and beauty topics useful.
Why Brow Gel Flakes: The Real Culprits
Flaking is rarely just about a "bad" product. It's usually a combination of formula, skin type, and application technique. Understanding the causes makes it much easier to fix.
Many brow gels rely on film-forming polymers, similar to those used in mascaras and hair gels, to hold hairs in place. Common examples include acrylates copolymers and PVP (polyvinylpyrrolidone), which create a thin, flexible film as they dry. If too much product is applied, or if it dries in thick layers, that film can become brittle and break into visible flakes when you touch your brows or move your face. Some formulas also contain higher levels of alcohol to speed up drying; this can increase stiffness and flaking, especially on dry or sensitive skin. According to ingredient overviews from the Personal Care Products Council and cosmetic chemistry resources like Chemists Corner, these polymers are safe and widely used, but they do emphasize the importance of correct use and balanced formulations.
Pre-existing dryness or product buildup on the brow area is another major factor. If there is dried foundation, powder, or old brow gel still sitting on the skin and hair, the new gel adheres to that debris instead of clean hair. As it dries and you move your face, the old layers crumble. This is why people who routinely use full-coverage foundation and setting powder around the brows often report more flaking. Similarly, if you're using strong acne treatments or retinoids on the forehead, the skin in the brow area may be drier and more prone to shedding tiny flakes that mix with the gel.
Finally, not all formulas are designed for the same level of hold. Very strong-hold "laminated" brow gels often contain more rigid film formers or higher solids. They can give that brushed-up, editorial look but may be less forgiving if you overapply or keep brushing through as they dry. Softer, conditioning gels with ingredients like panthenol or glycerin may feel more flexible and less flaky but offer a bit less structure. Matching the formula to your brow density, hair texture, and desired style is essential.
Step One: Proper Brow Prep for Flake-Free Hold
The way the skin and hairs are prepared before you ever touch brow gel is one of the biggest determinants of whether you'll see flaking later in the day. A clean, lightly hydrated canvas allows the gel to bind evenly to hairs instead of clinging to dry patches or makeup.
Start by thoroughly cleansing your face, including the brow area, with a gentle facial cleanser that suits your skin type. Overly harsh or stripping cleansers can leave the skin around the brows dry and tight, which increases the chance of micro-flaking once product is applied. Dermatology guidance from organizations like the American Academy of Dermatology suggests using lukewarm water and avoiding heavy scrubbing around delicate areas; this applies to brows as well. If you wear long-wear brow products, make sure you fully remove them at night with a suitable makeup remover so you're not layering gel over residue the next morning.
After cleansing, apply your usual skincare, but be strategic. Heavy, oily creams or thick sunscreen left sitting in the brow hairs can interfere with gel adhesion and cause clumping. Instead, focus richer products slightly above the brows and use a lighter moisturizer or gel texture directly through the brow area. If you use chemical exfoliants or retinoids on the forehead, consider stopping just above the brows to avoid excessive dryness there. Our skincare coverage has broader guidance on building routines that protect the skin barrier while still addressing concerns like acne and pigmentation.
Before moving to makeup, gently brush the brows with a clean spoolie to remove any loose skin flakes, stray hairs, or leftover powder. If you routinely use powder foundation or setting powder, it can help to sweep a slightly damp cotton bud through the brows to pick up excess product, then dry the area with a clean tissue. The goal is to have brow hairs that are completely dry, free from oily residue, and not coated in pigment before gel goes on. This single step significantly reduces the chance of the gel drying in thick, brittle layers.
Choosing the Right Brow Gel Formula for Your Brows
Not all brows need the same type of hold, and not all brow gels are equally prone to flaking. Choosing a formula that matches your brow density, hair texture, and skin type can solve half the problem before you even think about technique.
People with very thick, coarse brow hairs often gravitate toward extra-strong hold gels or "brow freeze" and "lamination effect" products. These typically rely on higher levels of film-forming agents and sometimes waxes or clays to keep stubborn hairs lifted. While effective, they can be more prone to visible residue if overused. If your brows are dense but you dislike stiffness, a medium-hold gel that layers well may be a better compromise. For fine or sparse brows, a lighter gel with microfibers or tint can add fullness without needing a rigid shell of product. Many brands use nylon or rayon fibers, similar to fiber mascaras, to create a fuller look; these can shed if disturbed, so gentle handling is key.
Skin type matters as well. On oily skin, gels may break down or slide, leading people to overapply in search of stronger hold, which then leads to flaking. A water-resistant or "long-wear" gel may grip better with less product. On dry or sensitive skin, alcohol-heavy formulas can cause tightness and visible white residue as they dehydrate the surface. Looking for gels with humectants like glycerin or panthenol, or those marketed as conditioning, can help. Ingredient databases such as the Environmental Working Group's Skin Deep or the Cosmetics Ingredient Review can be useful if you want to check specific components for sensitivity concerns.
Tinted versus clear formulas also behave differently. Tinted gels can replace or supplement pencil and powder, but if applied too thickly they are more likely to clump and show flakes of pigment. Clear gels are often more forgiving visually; even if a tiny bit of flaking occurs, it is less noticeable than with a deep brown or black tint. For those who prefer a very natural look, a light tint paired with a separate pencil or powder for shaping can offer control without forcing the gel to do all the heavy lifting. Our guides and tips section often explores these product combinations for everyday routines.
When possible, test texture before committing. A gel that feels extremely crunchy or sticky as it dries on your hand may behave similarly in the brows. A smoother, slightly flexible finish tends to be more forgiving, especially if you touch your face during the day.
Application Technique: How to Use Less Product and Get More Hold
Even an excellent formula will flake if it is overapplied or manipulated too much as it dries. A few simple technique changes can dramatically improve performance and comfort.
Start by wiping excess product off the wand. Most tubes load the spoolie with more gel than you actually need. Gently scrape the brush against the inner rim of the tube so the bristles are coated but not saturated. This is particularly important with thick or "lamination" gels. Then, begin application at the arch and tail of the brow, where you typically need more control, before moving to the front. Short, upward strokes that follow the natural direction of hair growth help distribute product evenly without smearing it onto the skin. If you do get gel on the surrounding skin, quickly clean it with a cotton bud before it dries; dried patches on bare skin are more likely to crumble later.
For fluffy, brushed-up styles, lift the hairs at the front of the brow at a slight angle rather than straight up, which can require more product to maintain and is more prone to visible crusting. Once you have shaped the brows, resist the urge to keep brushing as the gel sets. Many flaking issues come from repeatedly combing through semi-dry gel, which breaks up the forming film. Think of it like styling hair with strong gel: you usually get it into place, then leave it alone while it dries. For people who need maximum hold, some artists recommend a two-step approach: apply a very thin layer, let it almost dry, then add a second light pass only where needed.
If you are layering brow pencil or powder with gel, the order matters. Applying a heavy layer of powder first and then saturating it with gel creates a paste that is almost guaranteed to crack and flake. A more stable approach is to use gel first for shape and hold, let it dry fully, and then lightly add pencil or powder only where you need extra definition. Alternatively, you can sketch the basic shape with pencil, brush through to soften, and then apply a minimal amount of gel on top, taking care not to drag the colored product into clumps. For more in-depth brow routine ideas, our routines and makeup sections offer step-by-step breakdowns for different brow shapes and styles.
Layering with Other Makeup: Foundation, Powder, and Setting Spray
The rest of your makeup can either support your brow gel or work against it. The key is to avoid building too many dry, powdery layers under or over the brow hairs themselves.
When applying foundation, many artists recommend using a damp sponge or brush to diffuse product around the brows rather than directly through them. This leaves the underlying skin even without clogging the hairs. If you do get foundation in the brows, comb it out fully with a clean spoolie before moving on. Applying setting powder is similar: focus on the forehead and eye area, but use a lighter touch over the brows to avoid coating them in pigment and talc or silica particles. Studies on cosmetic powders, such as those discussed by the Journal of Cosmetic Dermatology, emphasize that these fine particles are designed to mattify and blur; in brows, they can instead create a chalky, flaky appearance once mixed with gel.
If you like to use a setting spray, timing can help. Spraying directly onto freshly applied brow gel can cause it to run or form tiny bubbles that dry into visible spots. Instead, let the gel dry completely first, then apply setting spray, or shield the brow area lightly with your hand when spraying. Some setting sprays contain alcohol; while this is generally safe on intact skin, repeated exposure on the brow area can contribute to dryness for some people. If you notice increased flaking on days you use a particular spray, it may be worth testing your routine without it.
For those who prefer ultra-minimal makeup but still want defined brows, you can skip foundation around the brow area entirely and just use a bit of concealer or brightening pen under the arch. This reduces the number of products that can mix with your gel. Our beauty and trends coverage often explores how current runway and social media looks adapt to real-life routines, including more skin-focused, less layered approaches that are naturally kinder to brow products.
Common Mistakes That Cause Flaking (And What to Do Instead)
Several habits repeatedly show up in professional feedback and consumer reviews as triggers for brow gel flaking. Being aware of them can help you troubleshoot quickly if your brows keep misbehaving.
One frequent mistake is treating brow gel like hair gel and loading it on until every hair feels glued. Because brow hairs are short and close to the skin, they simply do not require as much product to stay in place. Excess gel has nowhere to go but onto the surrounding skin, where it dries into visible patches. Another issue is applying gel to damp brows, whether from skincare, sweat, or water. Most film-forming polymers are designed to adhere to dry surfaces; when they are diluted, they can dry unevenly and peel. Always ensure the brow area is completely dry before application.
Touching or scratching the brows throughout the day is another major culprit. Even the best formulas will eventually break down if they are constantly disturbed. If you tend to rest your head in your hands or rub your forehead when thinking, it may help to be more mindful of this habit. Some people also find that wearing hats or beanies that rub against the brow area can disrupt gel and shed tiny fibers onto the brows, which then get caught in the product.
A subtler mistake is mixing too many types of brow products at once: wax pencils, pomades, powders, and gel layered together. Each has its own texture and drying behavior, and when stacked, they can form a thick, unstable coating that cracks. If you are getting flakes, simplify your routine to one or two products and see if that resolves the issue. For example, a tinted gel plus a fine-tip pencil for gaps is usually enough for most brows. If you want to explore alternative brow products like pens, waxes, or laminating solutions, our brands and products coverage regularly reviews how they perform in real-world routines.
Ingredient and Skin Considerations: When Flaking Isn't Just Cosmetic
Sometimes what looks like flaking brow gel is actually dry or irritated skin underneath, which becomes more visible once a product dries on top. In these cases, no amount of technique will fully fix the issue until the skin is addressed.
If you notice redness, itching, or a burning sensation along with flaking, it may be a sign of contact dermatitis or sensitivity to a specific ingredient. Common sensitizers in eye-area cosmetics can include certain preservatives (like formaldehyde releasers), fragrances, and some dyes. The American Contact Dermatitis Society and dermatology clinics often recommend patch testing new products on a small area of skin before regular use, especially if you have a history of cosmetic allergies. If your symptoms are persistent or severe, a dermatologist can perform formal patch testing to identify triggers.
For people with conditions such as seborrheic dermatitis or psoriasis that affect the scalp and eyebrows, flaking in the brow area can be part of the underlying skin condition rather than a reaction to makeup. In those cases, gentle medicated treatments recommended by a dermatologist, such as low-strength topical corticosteroids or antifungal creams, may be needed. Once the skin is calmer and less scaly, brow products usually sit much more smoothly. The National Psoriasis Foundation and National Eczema Association both offer guidance on managing these conditions around the eyes and brows.
If you are using prescription retinoids, benzoyl peroxide, or strong exfoliating acids near the brow area, consider adjusting how close you bring them to the brows and how frequently you apply them. These actives can improve skin texture and acne but are also known to increase dryness and peeling, as highlighted in patient information from sources like the Mayo Clinic. Spacing out applications or using a barrier-supporting moisturizer can reduce visible flaking under makeup.
Alternatives and Long-Term Options if Gel Keeps Failing You
If you have tried different formulas, refined your prep, and adjusted your technique but still find that brow gel flakes or feels uncomfortable, it may be worth exploring alternatives that reduce your reliance on daily gel.
One option is semi-permanent brow styling such as professional brow lamination. This chemical process, often performed in salons, restructures the brow hairs so they lie in a new direction, typically more lifted and brushed up, for several weeks. When done correctly by a trained professional following safety guidance, lamination can reduce the need for strong-hold gels because the hairs already sit in place. However, it involves chemical solutions similar to those used in lash lifts and may not be suitable for very sensitive skin. Organizations like the UK's National Health Service and various dermatology societies advise checking salon hygiene standards and patch testing before chemical brow treatments.
Another alternative is focusing on tinting and shaping rather than daily styling. Professional brow tinting or henna can deepen the color of the hairs, making them appear fuller with minimal product. Pairing this with regular trimming and shaping means you may only need a light, flexible gel or even just a clear conditioning serum to keep things neat. Microblading and similar techniques can also reduce the need for heavy makeup, but they are invasive, involve needles and pigment implantation, and carry risks of infection or dissatisfaction with long-term results. Prospective clients should research thoroughly and consult reputable practitioners.
For those who prefer to stay entirely within at-home, non-invasive routines, a softer approach is to use a clear lash and brow serum or light conditioning gel for everyday wear and reserve strong-hold products for special occasions. This can be kinder to both skin and brow hairs over time. Our wellness and health and fitness reporting often highlights how small, sustainable changes in grooming habits can support overall skin and hair health.
A Simple, Flake-Free Brow Routine to Try
Bringing everything together, a practical, low-flake routine might look like this:
After cleansing and applying your regular skincare, ensure the brow area is dry and free of heavy creams. Comb through the brows with a clean spoolie to remove any loose flakes or product. If you wear foundation, apply it around, not through, the brows and blend carefully. Use a minimal amount of setting powder on the forehead, keeping it as light as possible over the brow hairs.
Next, take your chosen brow gel and remove excess from the wand. Starting at the arch, brush the hairs in their natural direction with short, controlled strokes, then move toward the front of the brow, lifting slightly for a soft, lifted effect. Shape both brows, then allow the gel to dry without over-brushing. Once dry, use a fine-tip pencil to fill any small gaps with hair-like strokes, avoiding heavy shading that could mix with the gel and create paste. If you use setting spray, apply it at the end, keeping mist away from the brows as much as possible.
If you still see flaking, adjust one variable at a time: use less gel, try a different formula (for example, moving from a very strong-hold to a medium-hold option), or reduce the amount of powder in your routine. By methodically changing one element and observing the result, you can usually find a combination that gives you the hold you want without the dry, dusty finish.
For more detailed breakdowns of brow products, textures, and how they interact with different skin types, you can explore our hot new pages on brands and products, makeup, and guides and tips, which regularly revisit brow trends and techniques as new formulas appear on the market.
